
Learn three tarp pitches with the right angle and tension to keep rain running off your tent or picnic-table kitchen all night.
How to Set Up a Camping Tarp Over Your Tent or Kitchen — Three Pitches That Shed Rain — Quick Comparison

FREE SOLDIER Waterproof Camping Tarp Shelter Awning

Wise Owl Outfitters Hammock Rain Fly
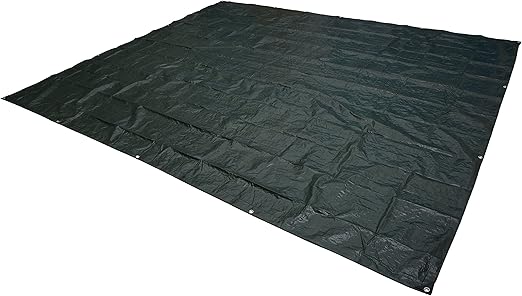
Amazon Basics Waterproof Multipurpose Camping Tarp

Clostnature Heavy Duty Tent Footprint Floor Saver

Tarp 12x16 Feet

GUARD SHIELD Heavy Duty Tarp 10x10 Feet Green Multi Purpose
Prices and ratings last checked Oct 6, 2026 and can change at any time. Confirm the current price on Amazon before buying.
A tarp is the cheapest insurance on the campsite. It can keep a rainfly from drowning in a puddle, turn a picnic table into a covered cook space, and buy you a dry spot to pull off wet boots before you crawl into the tent. The catch is pitch: a tarp that sags, droops, or sits flat collects water in the middle, and a fifty-gallon water balloon of fabric is not what you want flapping over your head at 2 a.m.
This guide walks through three reliable tarp configurations that actually shed rain — an A-frame over a tent, a lean-to extension off the rainfly, and a sloped kitchen fly over a picnic table. Pitch angle is the whole game. Water should always have somewhere to run, and that somewhere should be away from anything you care about.
Before You Pitch: The Three Rules That Decide Everything
Rule one: angle beats size. A 6 by 8 tarp pitched tight and steep will out-shed a 10 by 12 tarp pitched flat. Aiming for at least a 30-degree slope on any rain-facing panel gives water somewhere to go before it pools.
Rule two: tight is waterproof, slack is a sponge. A loose tarp sags under its own weight, then sags more as water collects, then dumps that water on you. Tighten the ridgeline first, then walk the corners and pull each one until the fabric hums.
Rule three: aim the downhill edge into open ground, not into your tent. Decide which way water will leave the tarp before you tie a single knot, and make sure that direction has air to drain into — not a stuff sack, not a tent vestibule, not your shoes.
For the broader picture on staying dry when weather moves in, the rain camping guide is worth a read before a wet trip. If you are still picking the tarp itself, start with the best camping tarps under thirty roundup.
Pitch One: A-Frame Over the Tent
The A-frame is the workhorse. A rectangular tarp runs over the tent's ridgeline like a second roof, with the long axis parallel to the tent and the fabric sloping down on both sides. Rain hits the tarp, runs to the long edges, and falls in two clean sheets to the ground well away from the tent walls.
Setup basics
- Tie a ridgeline between two trees or fixed points running parallel to and above the tent's ridgeline, ideally 12 to 18 inches higher than the tent so the tarp does not rest on the fly.
- Drape the tarp centered on the ridgeline, fold the short ends over the line, and clip or tie the tarp to the line at both ends.
- Stake the four corners out and slightly down so the tarp forms clean A-shaped sides, not hammocks.
- Add a center tie-down on each long edge if wind is up, so the tarp cannot bell out and catch wind.
The A-frame adds a buffer layer of air between the tarp and the tent fly. That air gap matters in heavy rain because it stops the two fabrics from touching, which is what causes a wet tent floor in the first place. A multipurpose tarp with reinforced corners makes this easier because the corners are the load-bearing points. The Amazon Basics Waterproof Multipurpose Camping Tarp with Reinforced Corners and Edges is a good baseline rectangular tarp for this kind of pitch.
For a hammock setup, the same A-frame geometry works with a ridgeline tarp suspended between two trees. A tarp designed for that geometry, with tie-outs already placed, can save a lot of fiddling. The Wise Owl Outfitters Hammock Rain Fly is shaped for that exact job.
Pitch Two: Lean-To Off the Rainfly
When the tent's own rainfly does most of the work, a small tarp pitched as a lean-to off the tent's door or side extends dry living space without doubling your setup. The tarp runs from a high point on or near the tent down to a single low stake, angled so rain runs off the low end into open ground.
Setup basics
- Anchor the high end of the tarp to a tree, pole, or even the tent's rainfly tie-out at about head height.
- Stretch the tarp out at a steep angle — closer to 45 degrees than 30 — so water has clear momentum off the surface.
- Stake the low edge so the tarp sits at least a couple of feet off the ground, leaving the side open for entry.
- Crank the downhill stake until the fabric is drum-tight, because a lean-to's whole job is to throw water off a steep face.
The lean-to is the right pitch when you want a covered spot to pull off boots, sort a wet pack, or sit out a shower without going inside. It is not the right pitch in a steady sideways rain, because the open side lets weather walk right in. In those conditions, either close the lean-to into a modified A-frame or wait it out under the tent.
A general-purpose shelter tarp with multiple tie-out points is flexible enough to handle both A-frame and lean-to duty on the same trip. The FREE SOLDIER Waterproof Camping Tarp Shelter Awning is the kind of piece that can do double duty here.
Pitch Three: Sloped Kitchen Fly Over the Picnic Table
A tarp over a cooking area has one non-negotiable requirement: it must stay high and open-sided, with any stove well out from under the fabric. A low, enclosed tarp traps combustion fumes and turns a kitchen into a hazard, so the goal is overhead cover only, never a windbreak wrapped around a heat source.
Setup basics
- Pick the high end of the tarp — usually the windward or uphill side — and tie it as high as you can reach on a tree, pole, or ridgeline, ideally 7 feet or more above the table.
- Stretch the tarp out over the table at a steep slope, aiming for the downhill edge to be at least chest height on the far side of the table.
- Stake the two downhill corners well out from the table so the tarp's drip line lands in open ground, not on the table edge.
- Position any stove at the picnic table with the burner end pointing into the open side of the fly, and keep the fabric at least a couple of feet above and away from the burner.
A heavy-duty, larger tarp handles this pitch better than an ultralight piece because the spans are longer and the stakes take more load. A thick poly tarp with reinforced edges, like the GUARD SHIELD Heavy Duty Tarp 10x10 Feet Green, gives the surface area and durability for a kitchen fly. A larger reinforced tarp, such as the Check the Tarp 12x16 Feet 8 Mil on Amazon, covers a full table plus a prep area on the downhill side. A footprint-style tarp is too small for a kitchen fly but is the right size as a ground sheet under the table to keep chair legs and the cooler off the wet dirt — the Check the Clostnature Heavy Duty Tent Footprint Floor Saver on Amazon works well in that role.
How to Choose a Tarp for Rain Pitches
Match the tarp to the pitch you will actually use, not the other way around.
- Shape. Rectangular tarps are the most flexible — A-frame, lean-to, and kitchen fly all come out of the same rectangle. Hexagonal and catenary-cut tarps shed wind better but are harder to repurpose.
- Tie-outs and reinforcement. Reinforced corners and stitched tie-out points are the difference between a tarp that lasts a season and one that rips on the first hard pull. A footprint-style tarp is fine as a ground sheet but rarely has the tie-outs to handle a fly pitch.
- Material thickness. A thicker poly tarp takes more abuse at the car campsite, including pine needles, saps, and rough stake work. A lighter silicone-coated tarp packs smaller for backpacking but asks for more care.
- Size relative to the job. Measure the tent or table first. A tarp that is too small has no chance of shedding rain — it needs to extend past whatever it is covering on the downhill side, or the runoff goes straight onto the thing you were trying to protect.
- Setup time. If you are car camping and only setting up once, a heavier tarp with more tie-outs is fine. If you are moving camp daily, weight and pack size start to matter.
Picking the Right Tarp for the Job
For an A-frame over a tent, a rectangular tarp with reinforced corners, around 9 by 11 feet, is the easiest starting point. A standard multipurpose tarp handles that pitch without needing specialty hardware.
For a lean-to off the rainfly, the same tarp works, but a smaller piece is easier to tension and quicker to redeploy if the wind shifts.
For a kitchen fly over a picnic table, plan on a larger, heavier tarp with strong grommets. The pitch is wider, the stakes work harder, and a lightweight piece can belly in the middle if the span is long.
For a footprint under a tent or table, any heavy poly tarp will do, since it lives on the ground and is not bearing any structural load.
Verdict
The tarp does not need to be expensive, but it does need to be pitched with intention. Pick the configuration that matches the job — A-frame for the tent, lean-to for a side entry, kitchen fly for the cook area — and put more energy into the angle and tension than into the fabric weight. A cheap tarp pitched tight and steep will keep a tent drier than a premium tarp left sagging. Practice one of these pitches in the backyard before a real trip, because fiddling with knots in sideways rain is not the time to learn that your ridgeline was six inches too low.
Related guides: Best Camping Tarps Under $30 — Top-Rated Picks · How to Camp in the Rain · Best Cheap Camping Tables for Cooking
Keep reading